Hello, hello, hello, girls! The highlight of the moment was Bruna’s suggestion and the idea arose from the talented @jewsie_nails.
To start, I painted my nails with Impala’s Spring Sky. It is a very light blue with a slight sheen. Two coats already cover well, but I used a very thin third to make sure the white of the nail didn’t show up in the photos. Impala still does not clarify the information on the packaging, but this color does not contain 3 (does not contain toluene, formaldehyde or DPB in its formula) it is allergy free! The/
- Then I applied 2 sized rhinestones on each nail.
- Just skipping the ring.
- Where this basic art will roll.
- Is it important to put a good pressure on rhinestones to make it look good?Enamel.
- Then I applied two generous layers of the top layer to make sure they didn’t fall off.
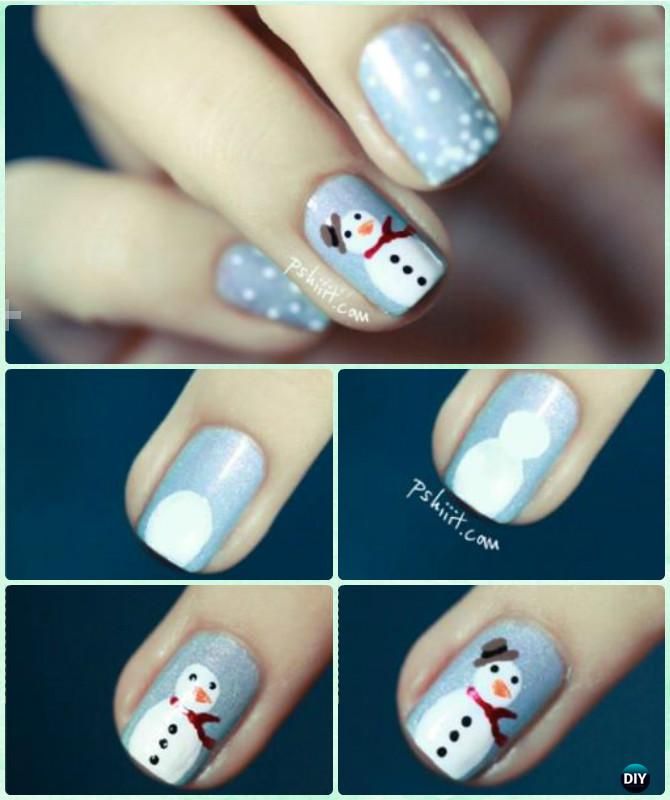
On the ring, I applied Colorama’s Flash enamel, Anyone who doesn’t have it can make balls with white enamel.
Using a small brush and white enamel, make a ball that will be the snowman’s body and a little smaller one, for the head.
Then, with the same small brush or a bowler, make the 3 buttons on your stomach, eyes, mouth and hat, like this:
With an orange nail polish (I used Physvelis, panvel) do it?Nose? With a diagonal line. With red enamel (I used Colorama’s 40 degrees), make the scarf.
Finish it all with a top layer and you’re done!
Until the next tutorial, guys! Merry Christmas.
Kisses, Melissa Menezes.
Blog: http://beautybymelissa. wordpress. com
Facebook: www. facebook. com/beautybymelissam
Instagram: @melissagmenezes